
Manage Location
Introduction
This document explains how to use and manage locations in MyMedLeads. It outlines how to create locations as well as how they are utilized within the system.
Intended Audience
This can be used by any MyMedLeads created User. If your electronic medical record system allows it, the document describes how it can identify locations.
How locations are Used within MyMedLeads
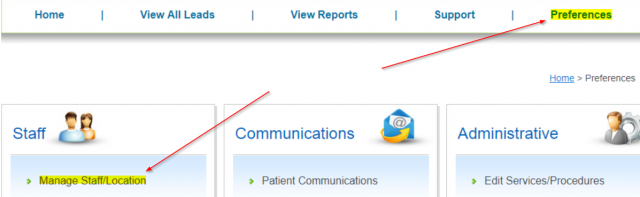
Locations serve various functions within MyMedLeads, including assigning default locations to individual leads and populating appointment confirmation emails and texts with location data. To add a new location in MyMedLeads, go to Preferences -> Manage Staff/Locations, scroll down to the Offices/Locations section, and click the Add New button. On the next page, fill in the details to create the new location.
You can update the Location details at anytime, and any system that uses this Location will automatically reflect the changes.

How to Manage Locations
Creating a Location is easy. Key features depend on the Location, so MyMedLeads needs to identify Locations from external systems.
If your website requests a Preferred Office/Location, the integrated Lead should contain the proper Location. The View All Leads page and individual leads display this information directly.
When integrating your EMR with MyMedLeads, name Locations exactly as they appear in your EMR. In some cases, the MyMedLeads team may need to map Locations behind the scenes. If your EMR system uses identification numbers rather than names, this process will be performed automatically.
Note: Re-importing Locations from your EMR could overwrite your website’s Location mappings and break two-way texting. The re-imported Location may replace the existing one.